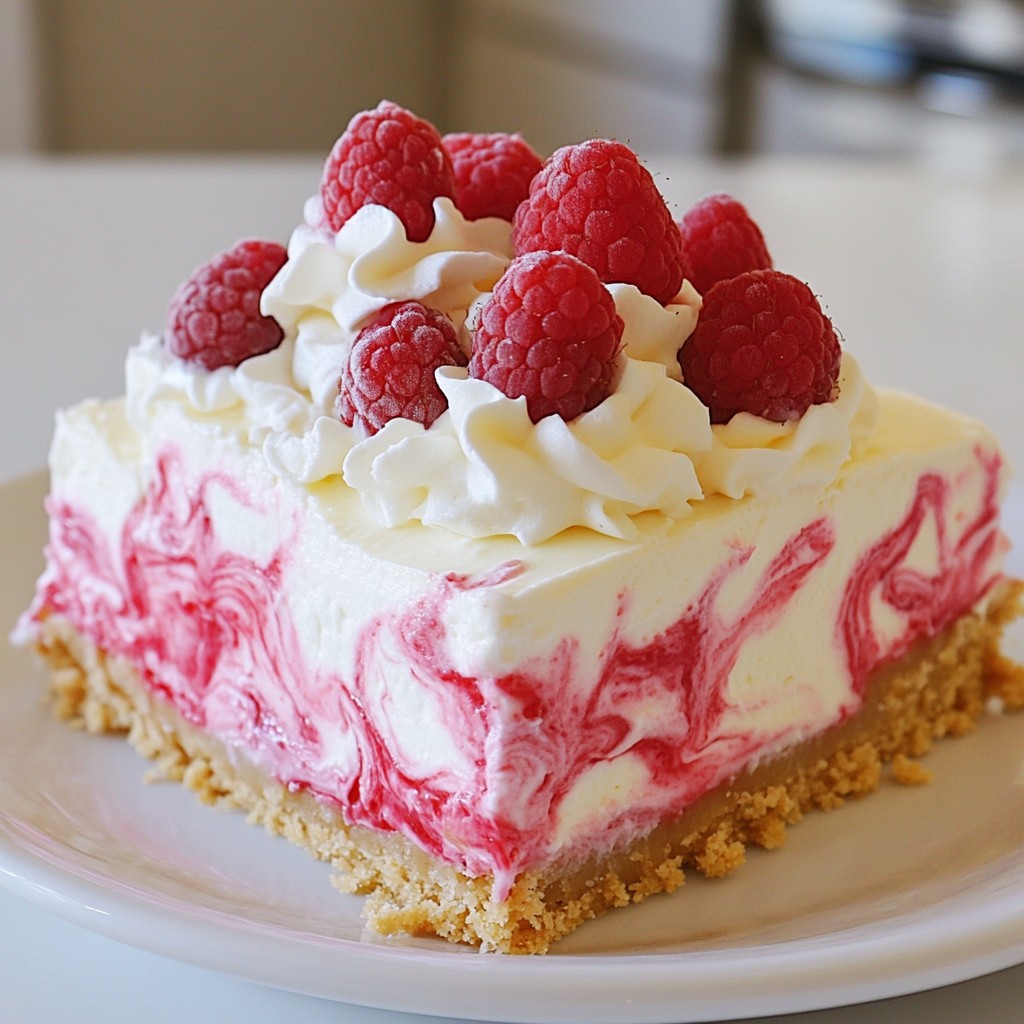
Are you ready to whip up a dessert that’s both zesty and creamy? Today, I'm sharing my favorite Raspberry Lemonade Cheesecake recipe. It's a delightful treat that's super easy to make, perfect for summer gatherings or a cozy night in. With just a few simple ingredients, you’ll create a sweet and tart dessert that will impress everyone. Let’s dive in and make this cheesecake magic happen!
Why I Love This Recipe
- Delicious Flavor Combination: The tangy lemon and sweet raspberries create a refreshing balance that’s perfect for any occasion.
- Elegant Presentation: This cheesecake looks stunning when garnished with fresh raspberries and whipped cream, making it ideal for gatherings.
- Easy to Make: With simple ingredients and straightforward instructions, this cheesecake is accessible for bakers of all skill levels.
- Versatile Dessert: Not only is it perfect for summer, but it also works well year-round as a delightful treat or special occasion dessert.
Ingredients
List of Ingredients Needed
To make a Raspberry Lemonade Cheesecake, gather these items:
- 1 ½ cups graham cracker crumbs
- ½ cup unsalted butter, melted
- 2 cups cream cheese, softened
- 1 cup granulated sugar
- 2 large eggs
- 1 cup sour cream
- ½ cup fresh lemon juice
- Zest of 2 lemons
- 1 cup fresh raspberries (plus extra for garnish)
- 1 tablespoon cornstarch
- ½ teaspoon vanilla extract
Each ingredient plays a key role in creating the perfect dessert. The graham cracker crumbs make a tasty crust. The cream cheese gives the cheesecake its rich and creamy texture. Fresh lemons and raspberries add a bright, tangy flavor that balances the sweetness.
Optional Garnishes
You can enhance your cheesecake with these fun toppings:
- Whipped cream
- Extra fresh raspberries
- Mint leaves
- A drizzle of raspberry sauce
These garnishes not only add flavor but also make your cheesecake look beautiful. A sprig of mint can bring a lovely touch of green.
Ingredient Substitutions
If you need to swap ingredients, here are some ideas:
- Use almond flour instead of graham cracker crumbs for a gluten-free base.
- Greek yogurt can replace sour cream for a tangy twist.
- If you don’t have fresh lemons, try bottled lemon juice.
These substitutions can help you customize the cheesecake to your taste or dietary needs.

Step-by-Step Instructions
Prepping the Oven and Crust
First, we start by preheating your oven to 325°F (160°C). This helps the cheesecake bake evenly. While the oven warms up, take a medium bowl and mix 1 ½ cups of graham cracker crumbs with ½ cup of melted butter. Stir until the crumbs soak up the butter. Next, press this mixture firmly into the bottom of a 9-inch springform pan. Make sure it is even. Bake the crust for 10 minutes. After baking, let it cool completely.
Making the Cheesecake Batter
Now, let’s move on to the batter. In a large bowl, beat 2 cups of softened cream cheese with 1 cup of granulated sugar. Use an electric mixer on medium speed until it is smooth and creamy. Add in 2 large eggs, one at a time. Mix well after each egg. Then, add 1 cup of sour cream, ½ cup of fresh lemon juice, the zest of 2 lemons, 1 tablespoon of cornstarch, and ½ teaspoon of vanilla extract. Mix until everything is combined. Finally, gently fold in 1 cup of fresh raspberries. Be careful not to crush them too much.
Baking and Cooling Process
Pour the cheesecake batter over your cooled crust in the springform pan. Smooth the top to make it even. Place it in the preheated oven and bake for 45-50 minutes. The edges should be set, but the center will still jiggle slightly. When time is up, turn off the oven. Crack the door open a bit and let the cheesecake cool inside for about an hour. This will help prevent cracks. After that, cover it and place it in the fridge for at least 4 hours, or overnight if you can wait. This step is key for the best taste and texture.
Tips & Tricks
How to Prevent Cracking
To keep your cheesecake smooth, avoid overmixing. Mix the batter on low speed. When adding eggs, do so one at a time. Mix gently after each addition. After baking, let the cheesecake cool slowly in the oven with the door ajar. This helps keep the surface intact.
Storing Leftover Cheesecake
Store leftover cheesecake in the fridge. Use an airtight container or cover it well with plastic wrap. This keeps it fresh for up to five days. If you want to save it longer, freeze slices. Wrap each slice in plastic wrap, then place in a freezer bag. It can last up to three months in the freezer.
Enhancing Flavor Profiles
To boost the taste, add a bit more lemon zest. This gives a bright, fresh flavor. You can also swirl extra raspberry puree on top before baking. For a fun twist, try adding a dash of almond extract. This adds a rich, nutty flavor that pairs well with the citrus and berries.
Pro Tips
- Use Room Temperature Ingredients: Ensure your cream cheese and eggs are at room temperature before mixing. This helps create a smoother batter without lumps.
- Don't Overmix: When incorporating the raspberries, fold gently to prevent them from breaking apart too much. This will maintain the beautiful marbled effect in your cheesecake.
- Prevent Cracking: Cooling the cheesecake in the oven with the door slightly ajar helps prevent cracks. This gradual cooling process is key to a perfect texture.
- Chill Overnight: For the best flavor and texture, refrigerate the cheesecake overnight. This allows the flavors to meld and the cheesecake to set properly.
Variations
Alternative Fruit Additions
You can switch up the raspberries for other fruits. Strawberries work well. Blueberries bring a nice twist too. You can also try blackberries for a fun flavor. Mix and match fruits for a colorful treat. Each fruit offers a unique taste. Just make sure to keep the same amount as the raspberries.
No-Bake Raspberry Lemonade Cheesecake
If you want a quick version, try a no-bake cheesecake. Start with the same crust. You just need to skip the baking step. Combine cream cheese, sugar, sour cream, and lemon juice. Fold in your raspberries gently. Pour this mix into your crust and chill it for at least four hours. It's easy and still so tasty!
Gluten-Free Crust Options
For a gluten-free option, use gluten-free graham crackers. You can also make a nut crust. Combine ground almonds or walnuts with melted butter. Press this mixture into your pan for a yummy base. Both options taste great and work well in this cheesecake. Enjoy your dessert without worry!
Storage Info
Best Storage Practices
To keep your raspberry lemonade cheesecake fresh, store it in the fridge. Use an airtight container or cover it tightly with plastic wrap. This keeps the cheesecake moist and safe from other smells in your fridge.
Freezing Instructions
You can freeze your cheesecake if you want to save some for later. First, let it cool completely. Then, wrap it well with plastic wrap and aluminum foil. This prevents freezer burn. You can freeze it for up to three months. When you’re ready to enjoy it, thaw it in the fridge overnight.
How Long Does it Last?
In the fridge, your cheesecake lasts about five days. If stored properly, it stays fresh and tasty. Look for any signs of spoilage, like an off smell or mold. If you notice these, it’s best to throw it away.
FAQs
Can I use frozen raspberries?
Yes, you can use frozen raspberries. They will work well in this recipe. Just remember to thaw them first. Drain any extra liquid to keep the batter from being too wet. Frozen raspberries might be softer, but they still add great flavor.
What if I don’t have a springform pan?
If you don’t have a springform pan, don’t worry! You can use a regular cake pan. Just make sure to line the bottom and sides with parchment paper. This will help you remove the cheesecake easily after baking. You may need to use a knife to loosen the edges before flipping it out.
How do I know when the cheesecake is done baking?
To check if the cheesecake is done, look for set edges and a slightly jiggly center. It should not be liquid. You can insert a toothpick into the center. If it comes out mostly clean, your cheesecake is ready. Baking time can vary, so keep an eye on it.
We explored how to make a tasty cheesecake from start to finish. I shared ingredient lists, tips for baking, and ways to store leftovers. You learned fun variations and how to avoid common mistakes. With these steps, you can create the perfect dessert every time. Remember, practice makes perfect, and enjoy your cheesecake journey!