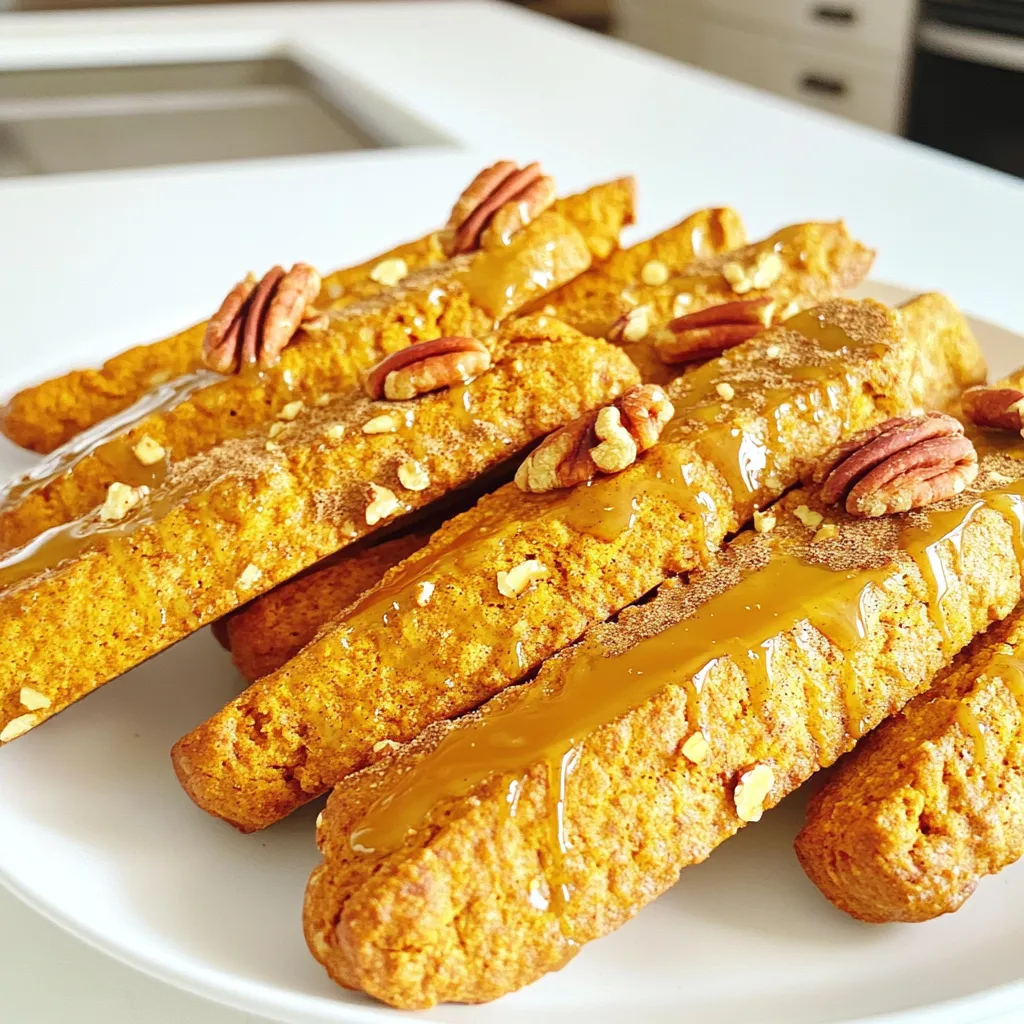
If you love sweet treats that bring fall flavors to your kitchen, you’re in for a treat! My Pumpkin Biscotti with Maple Glaze combines rich pumpkin spice and a sweet, sticky glaze that dances on your taste buds. This simple recipe uses easy ingredients and a few expert tips to ensure perfect biscotti every time. Ready to impress your friends and family? Let’s dive in and make this irresistible delight together!
Why I Love This Recipe
- Delicious Fall Flavor: The combination of pumpkin and warm spices creates a comforting and seasonal treat that’s perfect for autumn.
- Perfectly Crunchy: These biscotti have the ideal crunch, making them perfect for dipping into coffee or tea.
- Easy to Make: With simple ingredients and straightforward steps, you can whip these up in no time, even on a busy day.
- Customizable: You can easily add your favorite nuts or spices to make this recipe your own!
Ingredients
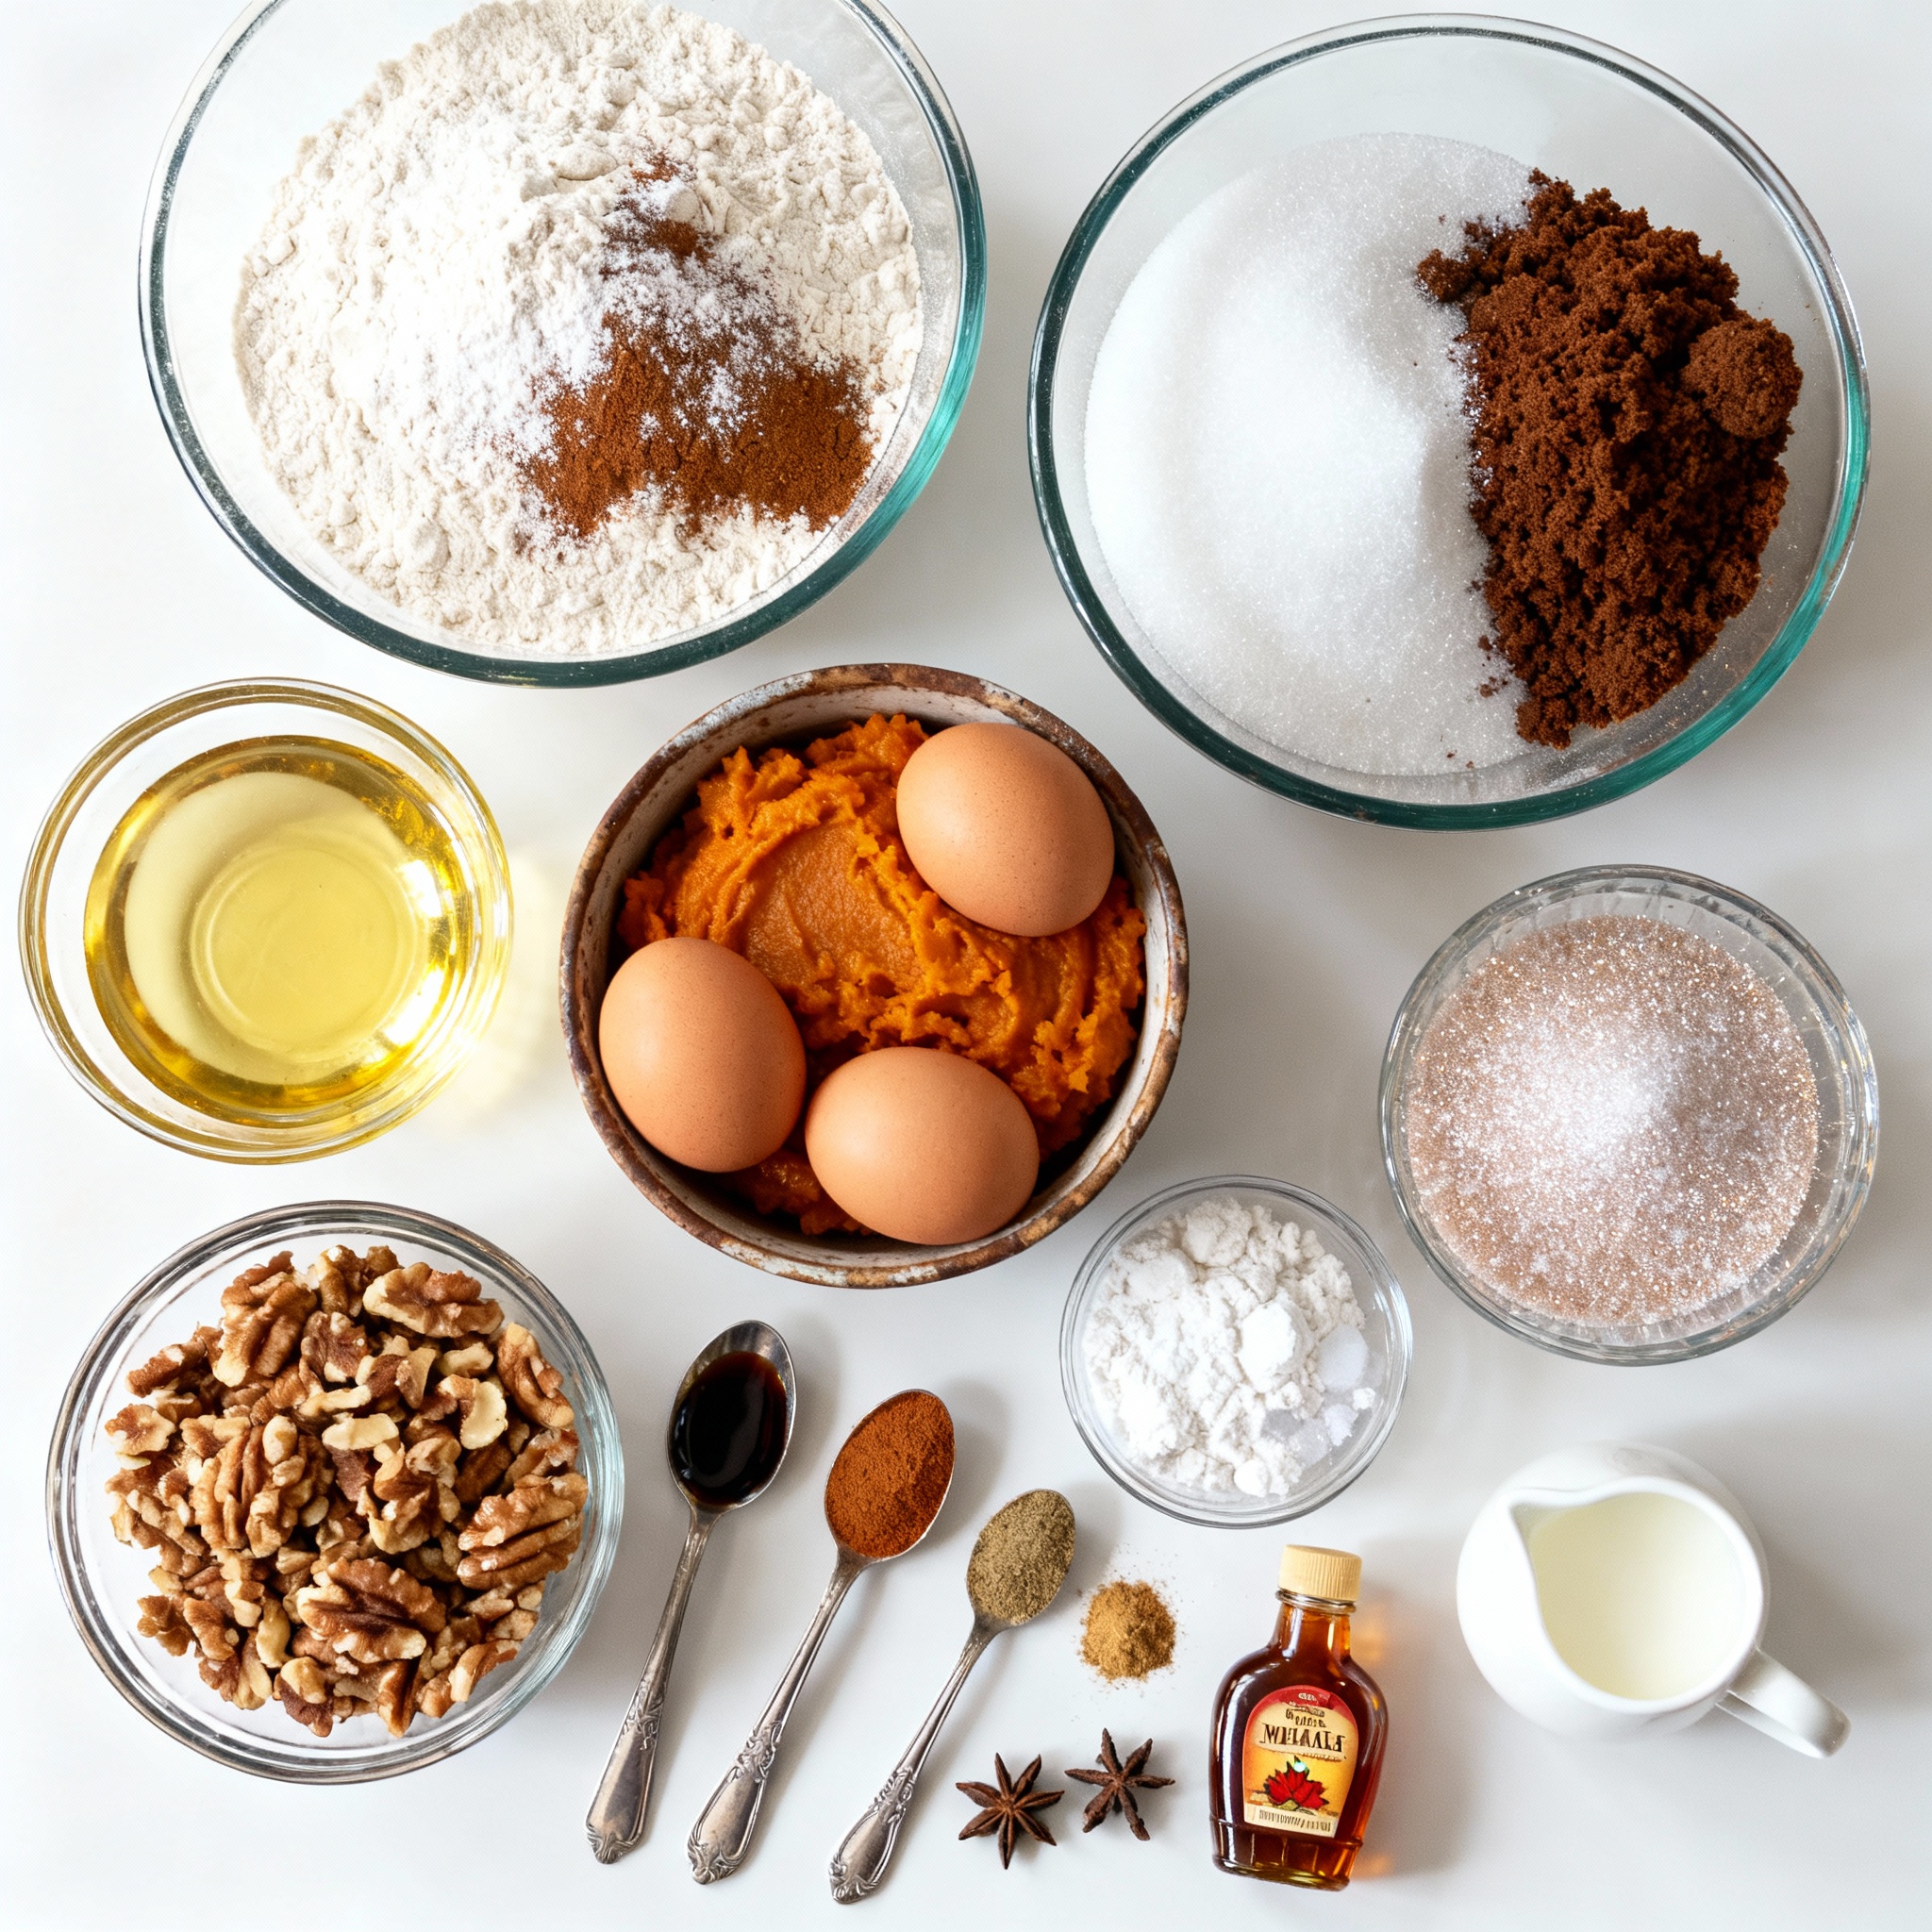
Essential Ingredients for Pumpkin Biscotti
To make pumpkin biscotti, you need these key ingredients:
– 2 cups all-purpose flour
– 1 cup canned pumpkin puree
– 3/4 cup granulated sugar
– 1/2 cup brown sugar, packed
– 1/4 cup vegetable oil
– 3 large eggs
– 1 teaspoon vanilla extract
– 2 teaspoons baking powder
– 1 teaspoon ground cinnamon
– 1/2 teaspoon ground nutmeg
– 1/2 teaspoon ground ginger
– 1/4 teaspoon ground cloves
– 1/4 teaspoon salt
Each ingredient plays a role. The canned pumpkin gives moisture and flavor. The sugars add sweetness and help with texture. Flour and baking powder provide structure for the biscotti.
Ingredients for Maple Glaze
For the sweet maple glaze, gather these items:
– 1 cup powdered sugar
– 3 tablespoons maple syrup
– 1-2 tablespoons milk (as needed for consistency)
This glaze complements the pumpkin flavor. The maple syrup adds a rich, sweet touch. Adjust the milk to get the right thickness for drizzling.
Optional Add-ins and Substitutes
You can customize your biscotti with these optional items:
– 1 cup chopped walnuts or pecans
If you want a nut-free version, leave them out. You could add chocolate chips or dried fruit for extra flavor. Use whole wheat flour for a healthier twist. Feel free to adjust spices to suit your taste.
Step-by-Step Instructions
Prepping the Dough
Start by preheating your oven to 350°F (175°C). Line a baking sheet with parchment paper to keep the biscotti from sticking. In a large bowl, whisk together the flour, baking powder, cinnamon, nutmeg, ginger, cloves, and salt. This mix brings out warm, cozy flavors. In a separate bowl, combine the canned pumpkin puree, granulated sugar, brown sugar, vegetable oil, eggs, and vanilla extract. Mix until everything blends smoothly. Gradually add the dry ingredients to the wet mixture. Stir until just combined. If you want nuts, fold them in at this point for extra crunch.
Baking the Biscotti Logs
Now, divide the dough in half. Shape each half into a log about 12 inches long and 2 inches wide. Place these logs on your lined baking sheet. Bake in your preheated oven for 25-30 minutes. You want them firm to the touch and lightly golden. Let the logs cool for about 10 minutes on the sheet. This helps them firm up before slicing.
Slicing and Second Bake
After cooling, reduce the oven temperature to 325°F (165°C). Using a serrated knife, slice the logs diagonally into 1-inch thick pieces. Be careful, as the logs can be a bit crumbly. Place the biscotti cut side down back on the baking sheet. Bake for an additional 15 minutes, turning them halfway through. This second bake gives the biscotti their signature crunch. Let them cool completely on a wire rack before glazing.
Pro Tips
- Use Fresh Spices: For the best flavor, use freshly ground spices instead of pre-ground ones. This will enhance the aroma and taste of your biscotti.
- Chill the Dough: If your dough is too sticky to handle, chill it in the refrigerator for about 30 minutes. This will make it easier to shape into logs.
- Slice Carefully: Use a serrated knife to slice the baked logs. This will help achieve a clean cut without crumbling the biscotti.
- Store Properly: Keep the biscotti in an airtight container at room temperature. They can last for up to two weeks, maintaining their crunchiness.
Tips & Tricks
How to Achieve the Perfect Biscotti Texture
To get the best texture for your biscotti, follow these steps:
– Measure your ingredients carefully. Use a scale if you can.
– Mix gently. Overmixing can make the biscotti tough.
– Baking time matters. The first bake should firm up the logs.
– Cool before slicing. Let the logs cool for a bit. This helps with slicing.
– Slice evenly. Use a serrated knife for clean cuts. Aim for 1-inch thick slices.
Common Mistakes to Avoid
Here are some common mistakes to watch for:
– Not preheating the oven. Always preheat to ensure even baking.
– Skipping the second bake. This step makes the biscotti crunchy.
– Not using parchment paper. It helps with easy removal and cleanup.
– Ignoring the cooling time. Cutting too soon can cause crumbling.
Best Practices for Glazing
Glazing adds a sweet finish. Here’s how to do it right:
– Use powdered sugar. It gives the glaze a smooth texture.
– Add maple syrup slowly. Mix until you reach your desired consistency.
– Drizzle over cooled biscotti. This keeps the glaze from melting.
– Let it set. Allow the glaze to harden before serving.
With these tips, you will create perfect pumpkin biscotti with a lovely maple glaze every time. Enjoy the process and share your creations!
Variations
Gluten-Free Pumpkin Biscotti
You can easily make this recipe gluten-free. Swap out the all-purpose flour for a gluten-free blend. Many brands work well, so pick one that you like. Make sure the blend contains xanthan gum, which helps with texture. The result will still be delicious and crunchy.
Flavor Variations
Feel free to play with flavors in your biscotti! You can add chocolate chips for a sweet twist. Just fold in 1 cup of chocolate chips when mixing your dough. For a spicier option, try adding more ginger or cinnamon. A dash of allspice can also add warmth. If you love citrus, add the zest of one orange or lemon for a refreshing note.
Nut-Free Options
If you want to skip nuts, simply leave them out. The biscotti will still taste great without them. You can add seeds like sunflower or pumpkin seeds for crunch instead. This keeps the texture nice and gives a nutty flavor without using nuts.
Storage Info
How to Store Homemade Biscotti
To keep your pumpkin biscotti fresh, store them in an airtight container. This helps maintain their crunchy texture. I recommend placing parchment paper between layers if you stack them. This way, they won’t stick together. Keep them in a cool, dry place away from sunlight. They will stay fresh for up to two weeks.
Freezing Instructions
If you want to save some for later, freezing is a great option. First, let the biscotti cool completely. Then, wrap each piece in plastic wrap. Place them in a freezer-safe bag or container. They can last up to three months in the freezer. When you’re ready to enjoy, just thaw them at room temperature.
Best Ways to Reheat for Freshness
To revive the crunch, reheat the biscotti in the oven. Preheat your oven to 300°F (150°C). Place the biscotti on a baking sheet. Heat them for about 10 minutes. This will bring back their fresh taste and texture. You can also enjoy them straight from the container, but warming adds a nice touch!
FAQs
Can I use fresh pumpkin instead of canned?
Yes, you can use fresh pumpkin. Just cook and puree it first. This helps bring out the best flavor. Fresh pumpkin may have more moisture than canned. You might need to adjust the flour to get the right dough texture.
How long do these biscotti last?
These biscotti last about two weeks at room temperature. Store them in an airtight container to keep them fresh. If you want them to last longer, consider freezing them. They can stay good for up to three months in the freezer.
What can I serve with pumpkin biscotti?
Pumpkin biscotti pairs well with many drinks. Try serving them with coffee or chai tea. You can also serve them with warm milk or hot chocolate. For a fun twist, enjoy them with a scoop of vanilla ice cream.
This blog post covered all you need to know about making pumpkin biscotti. We explored essential ingredients, steps for perfect baking, and tips for a great texture. You learned about variations for gluten-free and nut-free options, plus how to store your biscotti.
With these guides, you’ll create tasty treats that impress. Keep experimenting with flavors and enjoy your baking journey!
.png)