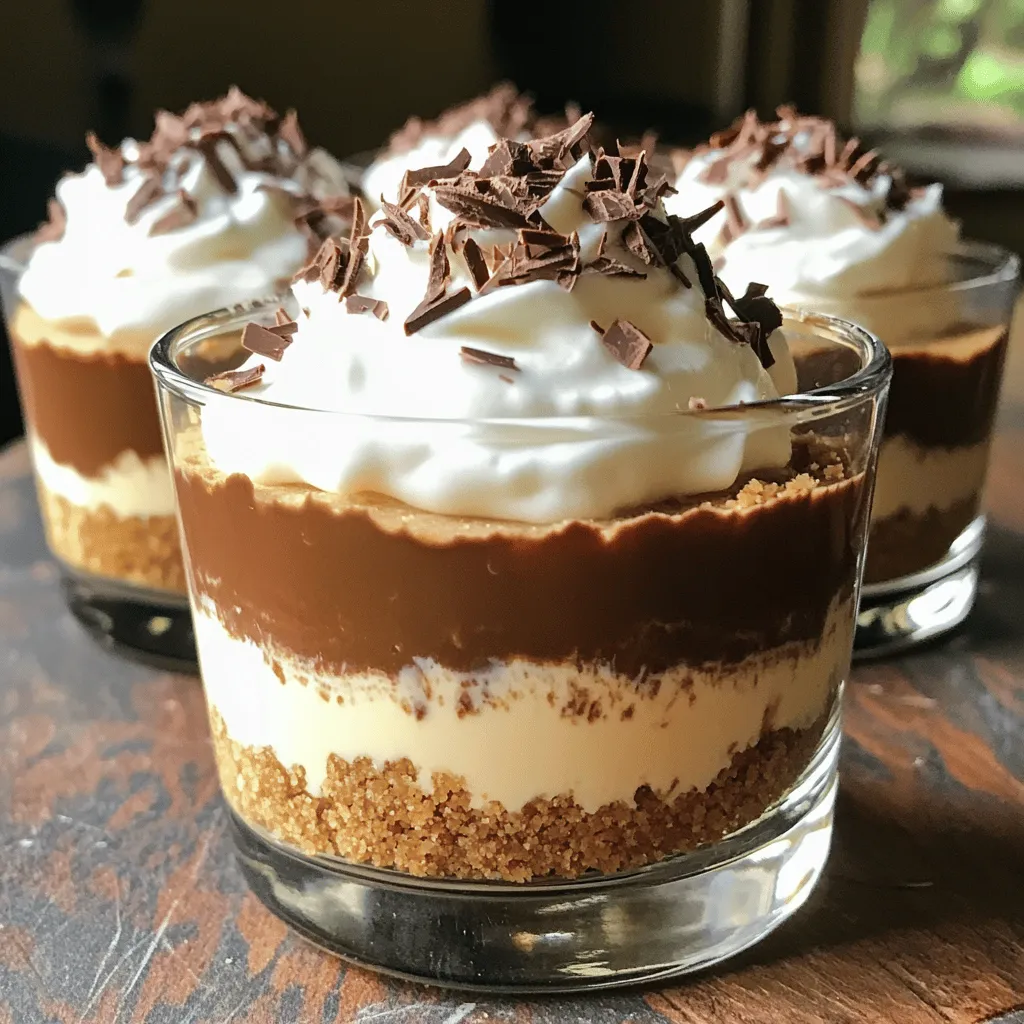
Looking for a tasty treat without the oven? These No-Bake Mocha Cheesecake Cups are rich, creamy, and perfect for coffee lovers. I’ll guide you through simple steps to make this delightful dessert at home. With easy ingredients and quick prep, you’ll impress your friends and family in no time. Let’s dive into making these amazing cups that will satisfy your sweet tooth!
Why I Love This Recipe
- Decadent Flavor: This mocha cheesecake combines rich chocolate and coffee flavors, creating an indulgent dessert experience.
- No-Bake Convenience: With no baking required, this recipe is perfect for warm days or when you want a quick dessert solution.
- Easy to Make: The simple steps make it accessible for both novice and experienced bakers alike.
- Impressive Presentation: Served in individual cups, these cheesecake treats are visually appealing and perfect for gatherings.
Ingredients
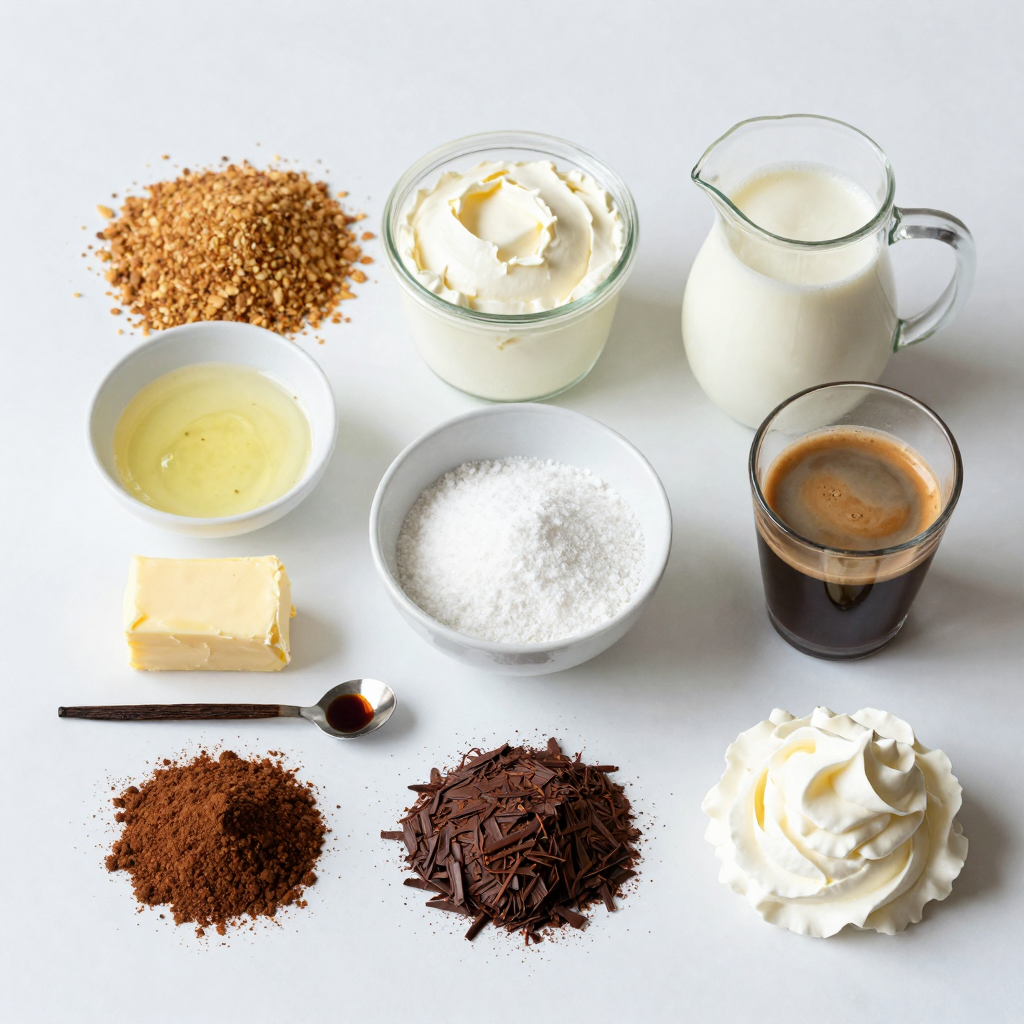
List of Ingredients
– 1 cup of graham cracker crumbs
– 1/4 cup of melted butter
– 2 cups of cream cheese, softened
– 1/2 cup of powdered sugar
– 1/2 cup of heavy cream
– 1/4 cup of espresso, cooled (or strong brewed coffee)
– 1 teaspoon of vanilla extract
– 2 tablespoons of cocoa powder
– 1/4 cup of chocolate shavings (for garnish)
– Whipped cream (for topping)
Key Ingredients for Flavor
The key to a great No-Bake Mocha Cheesecake Cup is balance. The cream cheese gives it a rich base. The espresso or strong coffee adds a bold flavor. Cocoa powder gives a deep chocolate taste. Vanilla extract rounds out the flavors. Each ingredient plays a part in making this treat special.
Suggested Substitutes
If you want to change things up, here are some ideas:
– Use graham cracker crumbs made from gluten-free cookies for a gluten-free crust.
– Swap cream cheese with a dairy-free cream cheese for a vegan option.
– If you don’t have espresso, use strong brewed coffee or even decaf.
– You can use honey or agave instead of powdered sugar for a natural sweet taste.
These substitutes can help you customize the recipe to fit your taste and dietary needs.
Step-by-Step Instructions
Preparation of Crust
First, gather your ingredients. You need graham cracker crumbs and melted butter. Combine these in a mixing bowl. Stir until the crumbs are all coated in butter. This makes a tasty base. Next, take serving cups and divide the crumb mixture into them. Press down firmly to form a crust layer. Make sure it is even. Set these aside while you prepare the filling.
Making the Mocha Cheesecake Filling
Now, let’s move on to the filling. In a large mixing bowl, beat the softened cream cheese until it is smooth. This step is very important for the texture. Gradually add powdered sugar while mixing on low speed. This helps it blend well. Next, pour in the cooled espresso or coffee, vanilla extract, and cocoa powder. Blend everything until it is smooth and creamy. In another bowl, whip the heavy cream until soft peaks form. Gently fold this whipped cream into the cream cheese mixture. This gives the cheesecake a light and fluffy texture.
Assembling the Cheesecake Cups
With the crust and filling ready, it’s time to assemble. Spoon or pipe the mocha cheesecake mixture into the cups. Fill them about three-quarters full. This allows room for toppings later. Make sure to spread the filling evenly on top of the crust. Cover the cups with plastic wrap and place them in the fridge. Let them chill for at least four hours, but overnight is best. This helps the cheesecake set perfectly.
Setting and Serving Tips
Before serving, remember to add the finishing touches. Take each cheesecake cup and add a dollop of whipped cream on top. Sprinkle chocolate shavings for a nice look and extra flavor. These small details make your dessert shine. Serve chilled and enjoy your delightful mocha cheesecake cups!
Pro Tips
- Use Fresh Espresso: For the best flavor, use freshly brewed espresso. It enhances the mocha flavor and makes the cheesecake more aromatic.
- Chill Overnight: Allowing the cheesecake cups to chill overnight will help the flavors meld together and achieve a firmer texture.
- Experiment with Toppings: Feel free to get creative with toppings! Try adding crushed nuts, a drizzle of caramel sauce, or even a sprinkle of sea salt.
- Use Room Temperature Ingredients: Make sure your cream cheese and heavy cream are at room temperature for a smoother mixture and better incorporation.
Tips & Tricks
How to Achieve the Perfect Texture
To get that smooth texture, start with room-temperature cream cheese. Cold cream cheese can make lumps. Beat it well until creamy before adding other ingredients. Always mix gently when folding in whipped cream. This keeps it light and fluffy. If you want a thicker filling, add a bit more cream cheese. For a silkier finish, blend the mixture longer.
Storage Tips for Freshness
Keep your mocha cheesecake cups in the fridge. Cover them with plastic wrap or a lid to prevent drying. They stay fresh for about four days. If you want to store them longer, think about freezing. Just make sure to wrap them tightly. Thaw them in the fridge before serving for the best taste.
Additional Garnishing Ideas
Garnishing makes your cheesecake cups pop! Top with extra whipped cream for a fluffy look. Chocolate shavings add a nice touch, too. You can also sprinkle cocoa powder for a rich flavor. For a fruit twist, add fresh berries on top. They not only look great but taste amazing with the mocha flavor!
Variations
Vegan No-Bake Mocha Cheesecake Cups
You can easily make vegan no-bake mocha cheesecake cups. Start by replacing cream cheese with soaked cashews or silken tofu. Blend them until smooth. Use maple syrup instead of powdered sugar for sweetness. For the heavy cream, use coconut cream. This keeps the rich flavor but makes it dairy-free.
Gluten-Free Options
To make gluten-free cheesecake cups, just switch the graham cracker crumbs. Use gluten-free cookie crumbs or ground nuts instead. Check labels to ensure they are truly gluten-free. This way, everyone can enjoy this tasty treat without worry.
Flavor Variations (e.g., Mint, Almond)
You can customize your cheesecake cups with different flavors. For a mint twist, add a few drops of mint extract. For almond flavor, use almond extract instead of vanilla. You can also fold in crushed cookies or fruits to mix things up. Get creative and find your favorite!
Storage Info
Best Practices for Storing
To keep your no-bake mocha cheesecake cups fresh, store them in the fridge. Use an airtight container or cover each cup with plastic wrap. This helps prevent the cheesecake from absorbing other smells in the fridge. Keep the cups away from strong-smelling foods to maintain their rich flavor.
Freezing Instructions
You can freeze these cheesecake cups for later. First, make sure they are well covered. Use plastic wrap or freezer-safe lids. Place them in the freezer for up to two months. When you’re ready to enjoy them, transfer the cups to the fridge overnight. This helps them thaw slowly and taste just as good.
How Long Do They Last?
When stored in the fridge, these cheesecake cups last about five days. If you freeze them, they can last up to two months. Always check for any signs of spoilage before eating. If you notice any off smell or texture, it’s best to discard them. Enjoy your mocha treats fresh for the best taste!
FAQs
Can I use instant coffee instead of espresso?
Yes, you can use instant coffee. Just mix it with hot water to dissolve. This will give you a similar coffee flavor. The mocha taste won’t change much. Just make sure to use a strong mix for the best results.
How do I make a larger batch?
To make more cups, simply double the recipe. Use 2 cups of graham cracker crumbs and 4 cups of cream cheese. You’ll also need to double the other ingredients. This way, you can serve more friends and family.
What can I do if the filling is too runny?
If the filling is too runny, add more cream cheese. Mix in small amounts until it thickens. You can also chill it longer. This helps the filling firm up before serving.
Can I make these in advance?
Yes, you can make these cups a day ahead. Store them in the fridge until ready to serve. Just add whipped cream and chocolate shavings right before serving for freshness.
Are there lactose-free options available?
Yes, you can use lactose-free cream cheese and heavy cream. This makes the recipe safe for lactose-intolerant friends. The taste will be just as yummy!
This blog post covered all the details for making delightful Mocha Cheesecake Cups. We discussed the essential ingredients and shared some tasty substitutes. I walked you through the step-by-step process, from preparing the crust to serving tips.
Also, I gave tips for texture and storage, plus variations to try. Remember, small changes can lead to unique flavors. Enjoy your baking adventure and impress your friends and family with your delicious creations.